When Progress Seems Invisible
When Progress Seems Invisible

You might get the impression from our blog that we are always up to fun, exciting projects, but that's not necessarily true. Sometimes we make progress without really seeming to make progress, and it's not much fun, either. What have we done since our last blog post? Well, we washed all the floors, windows, and walls in the upstairs rooms, tore out the carpet in the master (that we aren't using as a master for now), relocated the junk in the first bedroom on the left, painted all the closets, removed all the baseboard heating upstairs, took down the remaining panelling and painted in the first bedroom on the left, mopped (thoroughly) all the floors again, replaced electrical outlet covers, bought light switches and switch covers (that we have yet to install), installed missing baseboards, plugged holes with expanding foam, and replaced all the lightbulbs upstairs. Progress? Definitely. Fun? Not so much. Pictures? I would not want to submit you all to such a boring post.
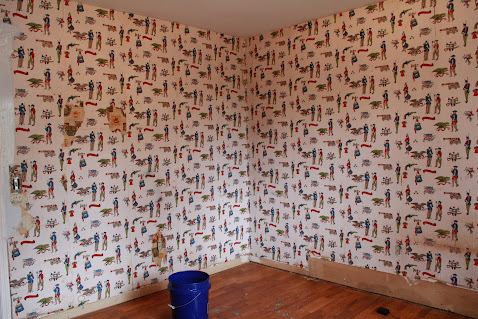
Okay, I lied. One picture. Now you understand why we painted the first bedroom on the left after we removed the rest of the panelling! We didn't think we could handle sleeping in that room for the next three years while we renovate the main floor.
Just know that we have now made enough progress on the upstairs that we were FINALLY able to start moving furniture here. Now that is exciting.
We officially have all the furniture at the house with the exception of our beds, Rylee's crib, the fridge, and the upright freezer. We are using these next two weeks to get the rooms set up and ready for our final move. We are a little nervous about the move since the house isn't the greatest quality right now, but we are still (mostly) convinced that living here will allow us to expedite progress on the house. We will just have to bite the bullet, be brave, and make the move. Worst case, we will just move the beds back to my parent's house (at the expense of my cousins' backs, haha).
On to the more exciting updates!
The baby chicks hatched (yay!). We incubated 9 eggs, 7 of them turned out the be fertilized, and 5 of them hatched. The typical hatch rate is 80-90%, so we are right on target!


Dad and I built a beautiful, fun, and natural roost for the chickens. Bigger limbs on top for the older chickens, and smaller limbs on bottom for the younger chicks.

Thanks to Mom, Nene, and Papa, I was able to collect enough milk crates to make 11 nesting boxes! That should accommodate our 50+ chickens, nicely. Nene and I worked hard to figure out how to secure those boogers to the wall in a way that they could be easily removed and still stable enough to not fall when a chicken came in to lay an egg. We may still need a front board for more support. We shall see.

In the midst of all of the coop renovation, our poor little girl got her first case of hives. We aren't sure what exactly she was allergic to, but she was COVERED. All over! She was miserable--so itchy she made the rest of us itchy just looking at her! Luckily, they only lasted a couple days. Poor, little, polka-dotted baby.

We (okay, Sam) moved the lumber from the dump trailer to the barn in preparation for using the trailer to move furniture! It was a struggle getting the dump trailer up to the barn given that the gate into the barn lot is where our pond overflows when it rains too much. We really need to re-route the overflow.

We are starting to see an abundance of life on the property! The daffodils came and went, the Bradford pears bloomed then leafed out, and we have two types of mystery fruit trees.
Tree species #1 (it's down to either cherry or plum at this point). Based on the floral characteristics, I'm leaning towards cherry.

Tree species #2: they bud pink but bloom white. Based on the floral characteristics, my best guess is apple.
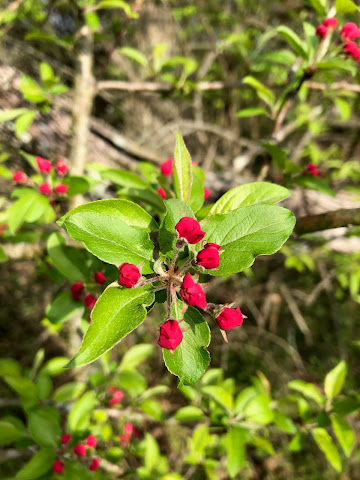
Our tulips are also blooming, and we have some kind of Lillies not far behind.


The birds came back, too, and I can't wait to set up my new bird feeder Sam got me for Christmas in the front yard.

We are officially official (sort of). Sam's wonderful Aunt, Caroline Russell, was kind enough to make us our very own farm labels! She made us a version for our egg cartons that we already turned into a stamp. We purchased 125 blank egg cartons to start stamping out our very own farm labels. We have 7 dozen eggs in the fridge from this past week, people. (Please, tell me you want eggs! $3 for a beautiful dozen of eggs) She also made us a version for everything else to do with our farm. The label on the right will be our official farm label. Once this terrible sickness has passed, we will likely be making t-shirts. Get excited! So, thank you, thank you, THANK YOU! to Aunt Caroline. You made our dream farm a little bit more tangible! (For anyone else looking for their own labels, let me know if you want her contact information. She's great to work with!)


We think Rylee is going to have curly hair!


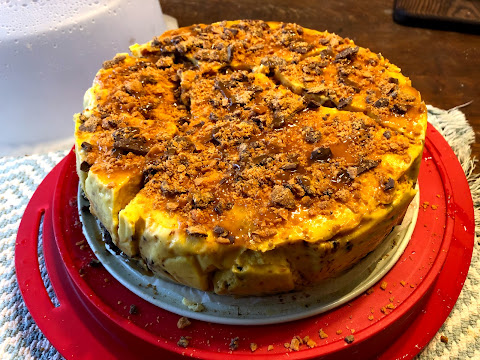
Last, but not least, can you guess the gender of Baby Burns #2 from this picture? Hint, look at the color of the cupcake batter all over Rylee's face.

(Because I searched all over the blog for these instructions last week thinking they were here...I'm going to post the "recipe" for canning chicken broth. I realize this is more for me than for you, sorry.)
CANNING CHICKEN BROTH
Instructions:
Time: ~1 hour
1. Heat your broth to simmering.
2. Wash the jars in hot water then fill with hot water and set aside.
3. Put the lids and rings in a pan with water and bring to a boil.
4. Poor the water out of the jars and fill with the chicken broth, leaving 1/2 inch of head space.
5. Put on the sanitized flats and lids, screwing the lids until finger tight (do not over tighten).
6. Put jars into pressure canner, trying to be symmetrical. If you don't have enough jars of broth, just substitute jars of water instead.
7. Fill the canner with 3 inches of water on the bottom.
8. Put the lid on and tighten the screws in a symmetrical fashion.
9. Make sure the pointy part is up and wait until there is steam coming out of all the holes.
10. Flip the pointy part down so that the pressure will start to build.
11. We want to can the broth at 10 lbs of pressure for 20 minutes. Once the canner has reached pressure, turn down the heat and keep an eye on it to maintain the pressure. An increase of heat increases pressure whereas a decrease of heat decreases the pressure.
12. After 20 minutes, remove from heat and wait until the pressure gauge reads zero.
13. Flip the pointy thing up to release any remnant water vapor and pressure.
14. Unscrew the lid screws in a symmetrical fashion, then remove the lid.
15. Set the jars on a flat surface and leave for at least 12 hours (24 preferably).
16. After 24 hours, tighten the rings and label the lids. Done!
Pax Domini cum spirito tuo temper sit,
Torey, Sam & Rylee
Do you or someone you know live near Harrodsburg, Kentucky?
Do you want to eat farm-fresh eggs from happy, healthy hens? <<<------------ 7 DOZEN EGGS CURRENTLY AVAILABLE
Check out our shop!
Do you or someone you know live near Harrodsburg, Kentucky?
Do you want to eat farm-fresh eggs from happy, healthy hens? <<<------------ 7 DOZEN EGGS CURRENTLY AVAILABLE
Check out our shop!
Comments
Post a Comment