Harvesting 50 Pounds of Honey
Harvesting 50 Pounds of Honey

William turned one month old on the 15th!
I managed to catch this cute picture mid yawn.

He's getting bigger everyday. He's been going through a growth spurt, so he is eating, eating, eating ALL the time. He also doesn't want to be put down, so we've been working on getting him used to it. Rylee helps by going over and laying with him.

Labor day weekend we harvested honey from our hive. (If you missed the post on the hive removal from our house this past spring, you can check it out here). Fr. Wheeler's family kept bees for three years, but they never got honey out of their hive. When he learned that we were planning on harvesting, he wanted to join in on the fun. Sam and I suited up in our spacesuits, and Fr. Wheeler and Brett wore the extra hat, veils and gloves. Fr. Wheeler was designated the official bee sweeper and Brett was the camera man. A big thanks to the two of them!
The top super was completely empty, but the next one was full of delicious honey. Just look at that honey comb! You can only harvest capped honey (uncapped has too high of a water content and will spoil), so we had to go frame by frame and pull out the ones that were at least 90% capped.

The further down the hive we got, the more bees we ran into. The brood comb was mainly on the bottom and for the most part, the bees did a good job of separating the honey from the brood comb even though we didn't put in a queen excluder. To be clear, we took honey from the hive, but we didn't completely rob the bees. Any frames not 90% capped, and any frames with brood were left for the bees. We made sure the bees had at least 8-10 frames (when you add up all the partial frames) of honey to get them through the winter.

An example of a frame that had both honey and brood.


In total, we left the bees 14 frames(ish) that were partially or completely full of honey, and we took 16 to harvest honey from.

Harvest time! We had a cute little helper! She loved watching the frames spin in the extractor.

We actually used the real kitchen for the harvest, so please excuse the exposed studs in the pictures. And the wonky coloring from the kitchen lights. (Construction loan is being processed so that we can start renovation. Yay!).
First, you have to remove the caps from each of the frames on both sides of the comb. The caps are mainly wax. Some beekeepers will pay for heated knives (either stationary or some that are electric and oscillate up and down). However, I had also seen in several videos of people using metal spatulas to scrape the honey. I picked up a couple paint scrapers from Walmart and washed them really well. The bevelled edge worked really well to get under the caps. The hardest part was making sure to not dig into the comb too far (I made that mistake a lot). The bucket you see is called a decapping tank and is a shallow tub with a hole in the bottom recessed in a deeper tub. A piece of wood is connected to the middle of the top tub to rest the frames on while scraping. As someone scrapes the caps off, the caps and honey fall through and collect in the bottom tub. We placed a spout that we didn't end up using on the bottom tub to pour the salvaged honey into the filtering tank.


So frames go from looking like this: full of delicious honey...

To this: as much honey removed from the comb as possible.


The five gallon bucket ended up only having about 4 inches of head space when we finished processing all the honey! That's almost 5 gallons of honey, weighing 52 pounds!
From there, we lifted the filtering tank onto the table and opened the spout to fill up the honey jars. Turns out that empty baby diaper boxes are the perfect height so that one does not have to hold a jar (or 97) while its filling. Watch this beautiful honey fill up the glass jars we picked out.

In total, we filled 19 large jars, 48 medium jars, and 32 small jars. Just a side note about the jars: we wanted good quality jars, and personally I prefer all things glass over plastic. So these jars are glass. We also made the labels in such a way that the jars can be reused without having to bother with removing labels and left over adhesive. Am I the only one who loves using small glass jars for random things?

We are selling the 16 oz jar for $12, the 8 oz jar for $8, and the 3 oz jar for $4. Please let us know if you or someone you know would like some fresh honey! It really is delicious!


We are hoping to make chapstick from the wax sometime in the near future.

practicing talking

and prepping our garden bed.

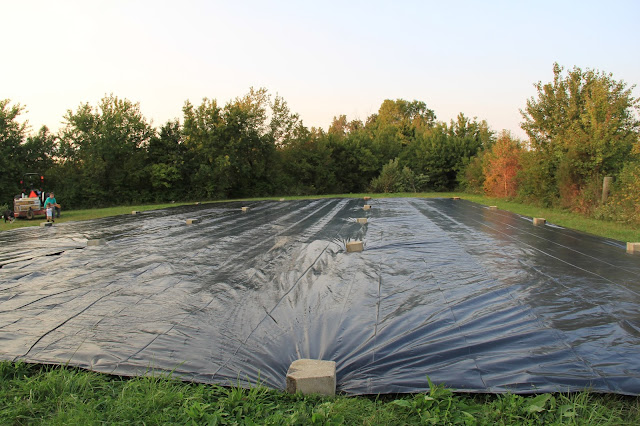
Not only did we have to remove a fence post, and two fence panels along with a bunch of brush to even be able to access this area without having to go the long way around, but then we had to cut down probably 15-20 trees, drag them over to burn piles on the edge of the field or put them into the dump trailer after unloading twenty 80 pound blocks (I let Sam do that part...poor buddy). We put down thick black plastic that we will leave there until next Spring to kill all the grass. The final area is about 100 x 60 ft, which will also account for a fence and space to walk in between the fence and the garden bed. It will give us plenty of space to separate crops (e.g. popcorn and sweet corn) that you don't want interbreeding. Here's hoping we aren't being too ambitious with our garden (blog posts from previous years will tell you that is usually the case).

Just a girl sittin' with her Daddy off of the edge of a tractor bush hog and admiring the days work.


William was worn out after being carried all over the field while I helped Sam move trees and mow.


BLUEBERRY BABKA BREAD
Ingredients:
Blueberry preserves:
2.5-3 cups of blueberries
3/4 cups sugar
1 tbs lemon juice
Babka dough:
4 cups bread flour
1/3 cup sugar + 1 tsp sugar, divided
1 tsp salt
2 1/4 tsp yeast
1 cup milk
2 eggs
1 tsp vanilla
10 tbs butter, softened and cubed
Cream Cheese filling:
8 oz cream cheese, softened
1/2 cup sugar
Sugar syrup:
1/3 cup sugar
1/3 cup water
Instructions:
1. To make the blueberry preserves, first combine the blueberries, sugar, and lemon juice into a pan and bring to a boil before reducing to a simmer for 15 minutes, stirring occasionally. Once done, scrape into a bowl and place into the fridge to solidify.
2. While the blueberries are cooking, whisk together the flour, 1/3 cup of sugar, and salt in a bowl.
3. Warm the milk to 100*F before adding the yeast and 1 tsp of sugar. Allow to sit for 5 minutes or until the yeast is bubbly.
4. Add the eggs and vanilla to the milk mixture and place into a mixing bowl.
5. Add the flour mixture a little at a time until all incorporated.
6. Add the butter and mix/knead until dough is smooth but still sticky.
7. Cover the bowl with plastic wrap and allow to rise for 1.5 hours.
8. While rising, make the cream cheese filling by combining the cream cheese and sugar and mixing until smooth.
9. Punch down the dough and separate into 2 equal parts. Roll each portion out on a lightly floured surface into a 12 x 16 rectangle.
10. Spread half the cream cheese on one portion, leaving 1 inch of uncovered space along one long edge. (Repeat with other portion).
11. Use a spoon to mix up the preserves until even consistency. Spread half the preserves on one portion, once again leaving 1 inch of uncovered space along one long edge. (Repeat with other portion).
12. Starting on the long edge with the cream cheese and preserves, tightly roll the rectangle. (Repeat with other portion).
13. Cut off the uneven ends. (Repeat with other portion).
14. Using a pastry scraper or a knife, cut the roll in half, trying to keep the halves equal. Then, keeping the cut edge always to the outside, twist the two halves around each other. (Repeat with other portion).
15. Using the heal of your hand, pinch the ends of the two halves together and transfer the whole twist into a bread pan. Fill the pan with parchment paper prior to placing the dough in if you want an easier time getting the loaf out later. Otherwise, no parchment paper or oil is necessary. (Repeat with other portion).
16. Cover with plastic wrap and allow to rise for 1 hour.
17. Bake at 350 degrees for 1 hour, covering with foil after 40 minutes if needed.
18. While baking, combine the sugar and water and heat until the sugar is dissolved. Allow to cool.
19. Brush each loaf with half of the sugar syrup until you have used it all.
Notes:
-I only had 2.5 cups of blueberries, adjusted the recipe accordingly, and it was plenty.
-I don't like chunks of fruit in my jelly-type-foods. So, I cut the blueberries up prior to making the preserves. It was probably then classified as a jam.
-With my wonky stove, I wasn't aware that my preserves were cooking somewhere in between a boil and a simmer. As a result, I don't believe the full 15 minutes were necessary, and I don't think I needed to put them in the fridge to set. But I followed the recipe anyway.
-I didn't keep the sliced edges to the outside when I was wrapping the loaves. It wasn't in the instructions, and I didn't notice in the pictures until after the loaves were baked. Hence the loaves are missing the traditional babka look. Sad day.
Enjoy!
Comments
Post a Comment